INTRO
Welcome! If you’ve been wondering how to install a shower in a bathroom wall, you’re in the right place. Over my 30+ years in home improvement, I’ve helped countless homeowners transform their bathrooms with safe, stylish, and leak-proof shower installations. This guide will walk you through the process step-by-step — from planning and preparation to waterproofing and finishing touches — so you can approach your project with confidence.
Why Proper Shower Installation Matters
A well-installed shower doesn’t just look great — it protects your home from water damage and mold growth. Since showers handle daily moisture exposure, proper waterproofing and plumbing are critical for long-term durability.
Risks of Improper Installation
Leaks that damage flooring and walls
Mold and mildew growth from trapped moisture
Costly repairs from rotted framing or plumbing issues
Planning Your Shower Installation
Before you start, plan your layout and determine if your existing plumbing supports your design.
Choosing the Right Shower Type
Tile showers: Fully customizable but require more skill
Fiberglass inserts: Affordable and quick to install
Walk-in showers: Accessible and modern
Pre-fabricated units: Convenient all-in-one solutions
Tools & Materials You’ll Need
Tape measure and level
Pipe wrench and adjustable pliers
Waterproofing membrane or backer board
Screws, anchors, and construction adhesive
Shower base or pan
Tile or shower panels
Grout, caulk, and sealant
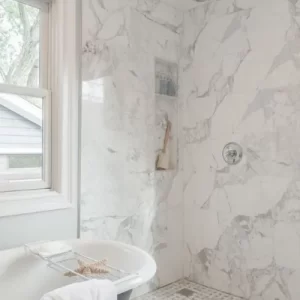
Preparing the Bathroom Wall
Proper wall prep ensures your shower is both sturdy and leak-proof.
Shower Wall Preparation Tips
Check that wall studs are plumb and secure
Add blocking for fixtures and accessories
Install moisture-resistant backer board
Apply waterproofing membrane before tiling or paneling
Installing the Plumbing
Rough-in the hot and cold water lines, and position the shower valve at a comfortable height (usually 38–48 inches from the floor). Don’t forget to align the drain exactly with the shower base opening.
Mounting the Shower Base or Pan
Set the base on a level surface, using shims if necessary. Apply silicone sealant around the edges to prevent water from escaping underneath.
Installing Shower Walls
For tile showers, start from the bottom and work upward, using spacers for even grout lines. For panels, follow manufacturer instructions for adhesive or mechanical fasteners.
Waterproofing Techniques
Use a liquid waterproofing membrane over seams and corners
Seal all penetrations for plumbing fixtures
Grout and seal tile properly to prevent water infiltration
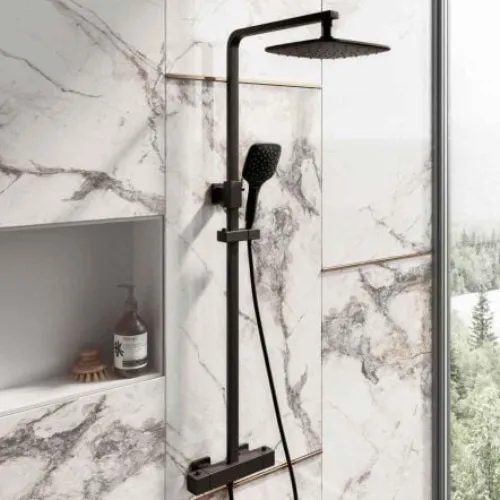
Adding Fixtures and Finishing Touches
Attach the showerhead, controls, and trim pieces. Seal around any gaps with silicone caulk to prevent leaks.
DIY vs. Professional Installation
While a skilled DIYer can handle a basic fiberglass unit, more complex tile or walk-in showers are best left to licensed contractors. They’ll ensure proper waterproofing, plumbing connections, and code compliance.
Testimonials
“My new walk-in shower is stunning, and I couldn’t be happier with the quality of the work!” — James H., Denver, CO
“I tried DIY in my last home, but this time I hired pros and the difference is night and day.” — Carla M., Orlando, FL
“They handled everything from plumbing to tiling. The result is flawless!” — Ryan S., Portland, OR
Did You Know?
Did you know that modern low-flow showerheads can save up to 2,900 gallons of water per year per household without sacrificing pressure?
TL;DR Summary
Plan your shower layout before starting
Choose a shower type that matches your skill level and style preference
Proper wall prep and waterproofing are essential
Level and seal the shower base to prevent leaks
Hire a pro for complex installations to ensure long-term performance
FAQs
1. What’s the easiest type of shower to install?
A pre-fabricated shower unit or fiberglass insert is usually the easiest. They come in one piece, require minimal cutting, and install quickly.
2. Can I install a shower without professional help?
Yes, if you have basic plumbing skills and the right tools. However, for tiled or custom showers, hiring a pro is safer and ensures long-term durability.
3. How do I waterproof a shower wall?
Use moisture-resistant backer board, apply a waterproofing membrane, and seal all seams and penetrations before tiling or installing panels.
4. What’s the average cost to install a shower in the USA?
Costs range from $1,500–$6,000 depending on size, style, and whether it’s a DIY or professional job. Custom tile showers can exceed $10,000.
5. How long does shower installation take?
A pre-fab unit can be installed in 1–2 days, while a tiled shower typically takes 4–7 days to allow for waterproofing and grout curing.